Tuesday, September 28, 2021

WALL HANGING

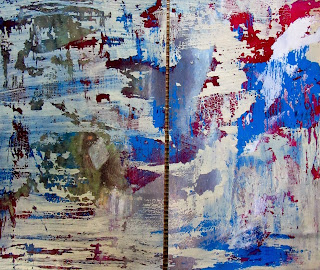
It has been a very long time between art projects but I was inspired to create this after attending the opening of a co-op art studio this last late summer. 

I wanted to make it large but the price of a large canvas was prohibitive so I bought these smaller ones and lay them all together and worked on them as one. Problem came up as to how to attach them so I came up with the idea of turning them over and using a large piece of cardboard I nailed it to the back. It worked. At least until I figure out a better way. The color does not show up very well but the back ground is a plum wall paint. The two bamboo images are made with torn wall paper from a catalog the leaves are cut from same pages. There are some faint bamboo images in back ground that are painted  on with acrylic paint and the image in lower left side is a postcard print from a painting I have. The artist's name is Gary Campbell who I met in Charleston, SC while on vacation.


Friday, March 30, 2018

NEW LIFE FOR AN OLD PLANTER


Several years ago I bought this Mexican made clay planter. I loved the shape and for a couple of years it looked great.  Then between the elements and our wonderful dog Marshal it was doomed for the trash. But I loved it so much I kept the pieces when we moved and for two years now I have been planning to fix it.


Finally this past week I had Bob move it to my studio table and set about doing what I could to repair it...As you can see there are major repairs to be made...Head to attach to base, feet to rebuild along with horns and ears.


The first day I used this 2 part Apoxy Sculpt to reset the head onto the body...This is marvelous stuff. It takes only a few hours to harden and can be sanded, drilled etc. Often used in museums to repair art pieces.


So far it is working...the next day the head was stable. Now to sculpt a foot, horns and do some repairs on the ears.


As you can see the feet, ears and horns are repaired...The next step is to add a coat of thin set with vinyl which will dry hard as concrete and that along with base coats of house paint will make it waterproof...

Finally the fun part...Over the next few days I will continue to paint in images and then paint in the background...Tedious but fun....following is the progression of the painting..

.


I am finished with the painting and I am happy with the way it tuned out.It is completely different then what it started out to be..a plain Mexican planter. Different is good! Change is good! New life is good! 

Now it will sit on my lanai just outside my sliding door. I will plant it with succulents that do not require so much water since it is going to be under roof...Our new greyhound doesn't like it...He is afraid of it but will get used to it in time. 

Thursday, January 26, 2017

AFTER THE STORM


This is the first step of my first art in 2017..I am going to call it After The Storm. I was inspired to make this assemblage after I saw the art of Abyssimo (https://www.facebook.com/abyssimo/
and then  went camping in December just after Hurricane Matthew blew through our area. Here I have my sticks and bark glued on along with some shells we picked up on a beach walk the first afternoon


Step two was adding both
Modeling Paste
and 
Crackling Paste


Texture
is
completed

Color added


The top photo is way to pastel for my taste so I added more intense color and toned down the metallic colors a bit...Much better.


Finished

Thursday, September 1, 2016

MORE CARDBOARD ART


Here I added multiple layers orienting the ribs in different directions and colored with watercolors


Another technique I tried was to cut away all the ribs down to very back then the moon and bird were added. 

Monday, September 21, 2015

CARDBOARD ART


While surfing one night I came across this technique of cutting away the top surface of a piece of corrugated cardboard exposing the inner ribs to form a design. This was my first attempt. Later I will add some tangling to this piece filling in the smooth spaces.


These are the tools I used...The serrated wheel for marking the lines, X Acto knife for slicing through the top layer of paper, skewer (not shown) for sliding through the grooves and lifting the paper and removing, tweezers for picking out hard to reach spaces and Staedler pigment 0.5 & 0.8 tips for doing the zentangling.  


Finished


I have so many ideas of ways to use this technique!


Another sample of the technique was to color the cardboard surface with pastel chalk, cut the design out, use the piece from left side and glue it onto right side after burning edges. Then burned the left edge.

Tuesday, May 12, 2015

JOURNALS..Paying it forward


********************************************************

I started out with a page from a wall paper sample...
I  then attached the page to a piece of 90 lb watercolor paper that I had messed up with a technique that went haywire...
 I used 3 colors of paint to do layers using Vaseline for a resist, letting it dry then wiping it between each color...after cutting it in half the lettering was painted on...
Then the papers were added to a cardboard backing for rigidity. All insides of covers are covered with a decorative paper and other embellishments were added.....
The tree is made of rigid wrap...
I finished the backs and fronts with lacing around or across and added beads to the loose ends...
I have added loose pages inside...some of my hand made paper and some art paper...
 The tree book has a poem written by Trish Weaver ...


**********


**********


**********


**********


**********